The Pedal Gee Bee
The ongoing saga of the construction of a pedal powered Gee Bee R2 replica for my kids.
Friday, August 19, 2005
Cowl Rib Tablesaw Jigs Complete
Time spent: 3 hours (evening)
Total time: 37.5
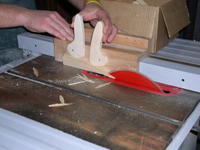
Started on the cowl rib jigs. I’m pretty sure that the scarfing fixture for the tablesaw can be adapted for later projects so I used some oak scrap I had to build it. When the project’s finished I can cut off the pine pieces on the front and save it.
To build it I measured the fence on my tables saw, cut the pieces and assembled the three-sided box shape that fits over the fence. Using glue and clamps to secure it, I let it sit overnight for finishing tomorrow.
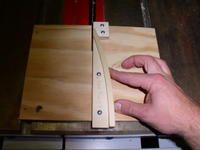
I modified the other tablesaw cowl fixture a little bit to make it more stable. Rather than having it slide in only one of the miter slots on my tablesaw, I made it large enough to span both. This can only make it more accurate. To build it I ripped some hardwood scrap to the dimensions of the slot to serve as the rails underneath the fixture. Then I cut a piece of ½ inch plywood for the “sled” wide enough to cover both miter slots. Place both rails in their slots, place the sled on top and pilot drill the four corners through the sled and slightly into the rails. Wile the fixture is still on top of the saw drive screws into each of the holes. Squareness to the front edge of the sled really doesn’t matter here as it will slide in the slots. Therefore the blade will always hit in the same spot on the fixture, and the saw kerf is what you really need to be square to. I took the fixture off of the saw, backed out the screws, added glue, and turned the screws back down.
Once the glue had dried, I removed the screws and reference cut the fixture in the saw. Taking a straightedge, I extended the cut line with a pencil. The fixture ramp and front block were installed along this line. The instructions say to use glue in all the fixtures, but in this case, as long as you’re careful with their placement, you can use screws. It allows you to do some adjusting if need be.


