The Pedal Gee Bee
The ongoing saga of the construction of a pedal powered Gee Bee R2 replica for my kids.
Tuesday, August 09, 2005
Nose Plate Recut & Wheel Cover
Time spent: 3.5 hours
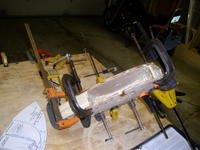
Finished cutting a gluing the nose plate assembly using the circle jig. Man, it’s so much easier with a jig. Glued two small scrap pieces of pine together this afternoon, and cut the nose plate prop spacer on the band saw.
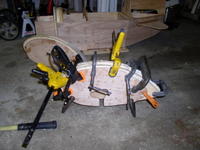
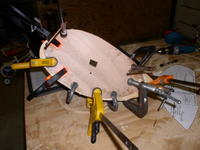
Separated and organized all of the wheel cover layers into a left and a right assembly. Marked all of the parts with their respective location left (outer cover, left, center, right, inner cover) and right (inner cover, left, center, right, outer cover). Gang-drilled all the layers of the wheel pants for dowel pins. Verified all of the holes lined up reasonably well throughout the “sandwich” and proceeded to glue.
The only goal I had here in glue-up was that it needed to line up, and it had to be tight, VERY tight. Not only is it going to bear the weight of the craft and the kid, it will experience some crank torque during pedaling. On top of that, since I had template routed the pine pieces to shape during the weekend, they had warped a good deal. No big deal, since they could easily be clamped back to true. So I got REAL liberal in the use of the urethane glue. This is where it got messy, but I didn’t care since the entire surface of the wheel cover assembly is going to be sanded to shape. I rounded the ends of the dowels, started them on the outside cover and placed each successive layer underneath with glue in the correct place. I then lightly tapped the dowel with a hammer to pass the dowel completely through the layer, and repeated the process until the entire assembly was “sandwiched”. Using the strongest C-clamps in the lot I clamped this thing together, especially the corners and ends, TIGHT. Just remember that the outer plywood covers are not the same size as the inner pine sections. You don’t need glue in certain places. But remember, it’s going to get completely sanded anyway, so have some fun and make a mess. You did get the lacquer thinner… right?


